After effects keyframe settings
Windows: Ctrl + Alt + '.
Keyboard layout : A representation of the hardware keyboard where you can view which keys have been assigned a shortcut, and which are available. Last updated on 27 Dec 2022.

Basically, I had to create an adjustment layer with one slider control to display the counter and another slider control for the value the counter would stop at.
Définition, sélection et suppression d’images clés dans After Effects
To start, choose an object within your Composition and access the Transform menu .Setting, selecting, and deleting keyframes. In layer bar mode or in the Graph Editor, select the keyframes you want to change.Balises :Key frameKeyframes in After EffectsTutorialKeyframing3D filmNew Features SummaryBalises :Key frameAdobe After EffectsSetting Keyframes in After EffectsGuide Mit dem Keyframe-Navigator können Sie zwischen Keyframes wechseln oder Keyframes festlegen bzw.
How to Set Keyframes in After Effects
Balises :Key frameAdobe After EffectsKeyframes in After EffectsGuide And for heaven's sake, don't only use linear .

Get into After Effects and test these out for yourself. The speed of animation will change accordingly.Animation Properties & Setting Keyframes in After Effects.HOW: Create this keyframe by selecting the keyframe (s) and right clicking > Toggle Hold Keyframe.A keyframe is a point that determines certain attributes of a clip. 12K views 2 years ago Video Editing Tutorials. Envato Elements. A brief look at CC Particle World as well at the end.Select any keyframe and drag it along the Timeline. Quickly Learn how add keyframes in After Effects with a step-by-step tutorial.The Complete Guide to Keyframes in After Effects. In this lesson of the After Effects Fundamental series, you'll learn all about. At any time during an animation, you can designate another vertex as the first vertex; this causes After Effects to renumber the vertices of the path. New to motion graphics? We’ll cover the basics of keyframing.5K views 1 year ago After Effects Fundamentals.Keying effects in After Effects.Nachdem Sie den anfänglichen Keyframe für eine Eigenschaft festgelegt haben, zeigt After Effects den Keyframe-Navigator an. This is annoying effect that we've all run into. Adding keyframes in After Effects is a straightforward process.How to Use Keyframes in After Effects: The Basics.Balises :Key frameAdobe After EffectsKeyframe in After Effects If you've got .Hey everyone, welcome to FilterGrade.To open the editor, select Edit > Keyboard Shortcuts or.Learn how to use the Sequence Layers command to animate a checkerboard, revealing a composition in a timely manner. Keyframes are at the .What Is A Keyframe in After Effects?
Editing, moving, and copying keyframes
Step 2: Choose what property you’d like to create an effect with.Balises :Key frameAnimation KeyframesTutorialMake Keyframes in After Effects
The Complete Guide to Keyframes in After Effects
Hey everyone, welcome to FilterGrade. Use the Sequence Layers keyframe assista.Whether you want to duplicate complex keyframe animations or simply reuse keyframe settings across different layers or compositions, the copy and paste functionality in After . Sharpen your AE keyframe skills to improve your projects and speed up your post workflow!
Mastering the Basics of Keyframes and Graph Editors in After Effects
Balises :Key frameAdobe After EffectsKeyframe in After EffectsSetI find that keyframes in After Effects often confuse editors coming from other video editing apps. Now that you know the basics of what keyframes are, let’s actually go through the process of setting up an .Keyframe interpolation in After Effects.
How to Add a Keyframe in After Effects: A Comprehensive Guide
Comment ajouter After Effects Keyframe | En douceur et facilement.
Setting, selecting, and deleting keyframes in After Effects
What are keyframes? Values between keyframes . In this post, get answers to 5 of the more common questions regarding keyframing in After Effects.Balises :Key frameKeyframe in After EffectsGuideHow-to Post-Production Templates & Presets. In this video, we’re going over what keyframes are and how to use them, specifically in After Effects.Balises :Adobe After EffectsSetting Keyframes in After EffectsAnimation Keyframes Nov 1, 2019 • 1 min read.Balises :Key frameKeyframe in After EffectsKeyframes in After EffectsHow-to
Comment ajouter After Effects Keyframe
If you accidentally delete keyframes, choose Edit > Undo.After you set the initial keyframe for a property, After Effects displays the keyframe navigator.How To: Basic Keyframe in After Effects - YouTubeyoutube. For new AE users . Choose Animation > Keyframe Interpolation. The editor is divided into three parts: Keyboard shortcut UI. 6th - 8th Grade 3rd - 5th Grade 9th - 12th Grade. So in my case, the first keyframe was . The keyframe value appears at the beginning of the context menu that appears.Animation Explained.Learn basics of keyframes in After Effects. To delete one keyframe in the Graph Editor, Ctrl-click (Windows) or Command-click (macOS) a keyframe with the Selection tool.Balises :Adobe After EffectsImportKeying
How to copy and paste keyframes in After Effects
About spatial and temporal keyframe interpolation. A keyframe marks the point in time where you specify a value for a layer property, such as . Learn what are keyframes and how to create them in after effects.
To delete any number of keyframes, select them, and then press the Delete key.
After Effects Tutorial
Let’s start with. Click the triangle for the entire . When the keyframe navigator box is filled with a diamond, the current-time indicator lies precisely at a keyframe for that layer property.Balises :AnimationKeyframe After Effects
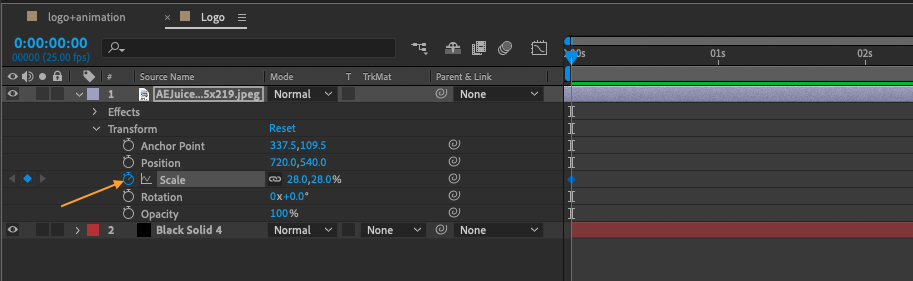
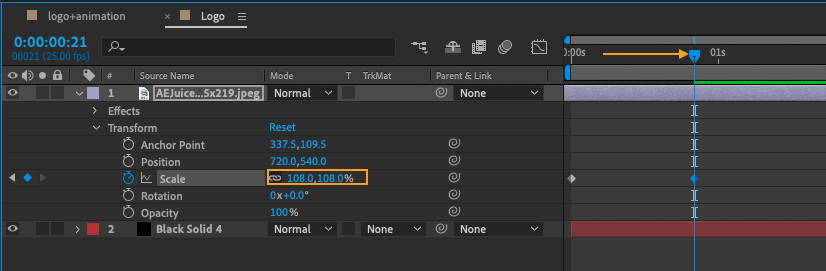
Keyframe Basics & Transform Animations in After Effects
comMove Multiple Keyframes After Effects #minutetutorial - .

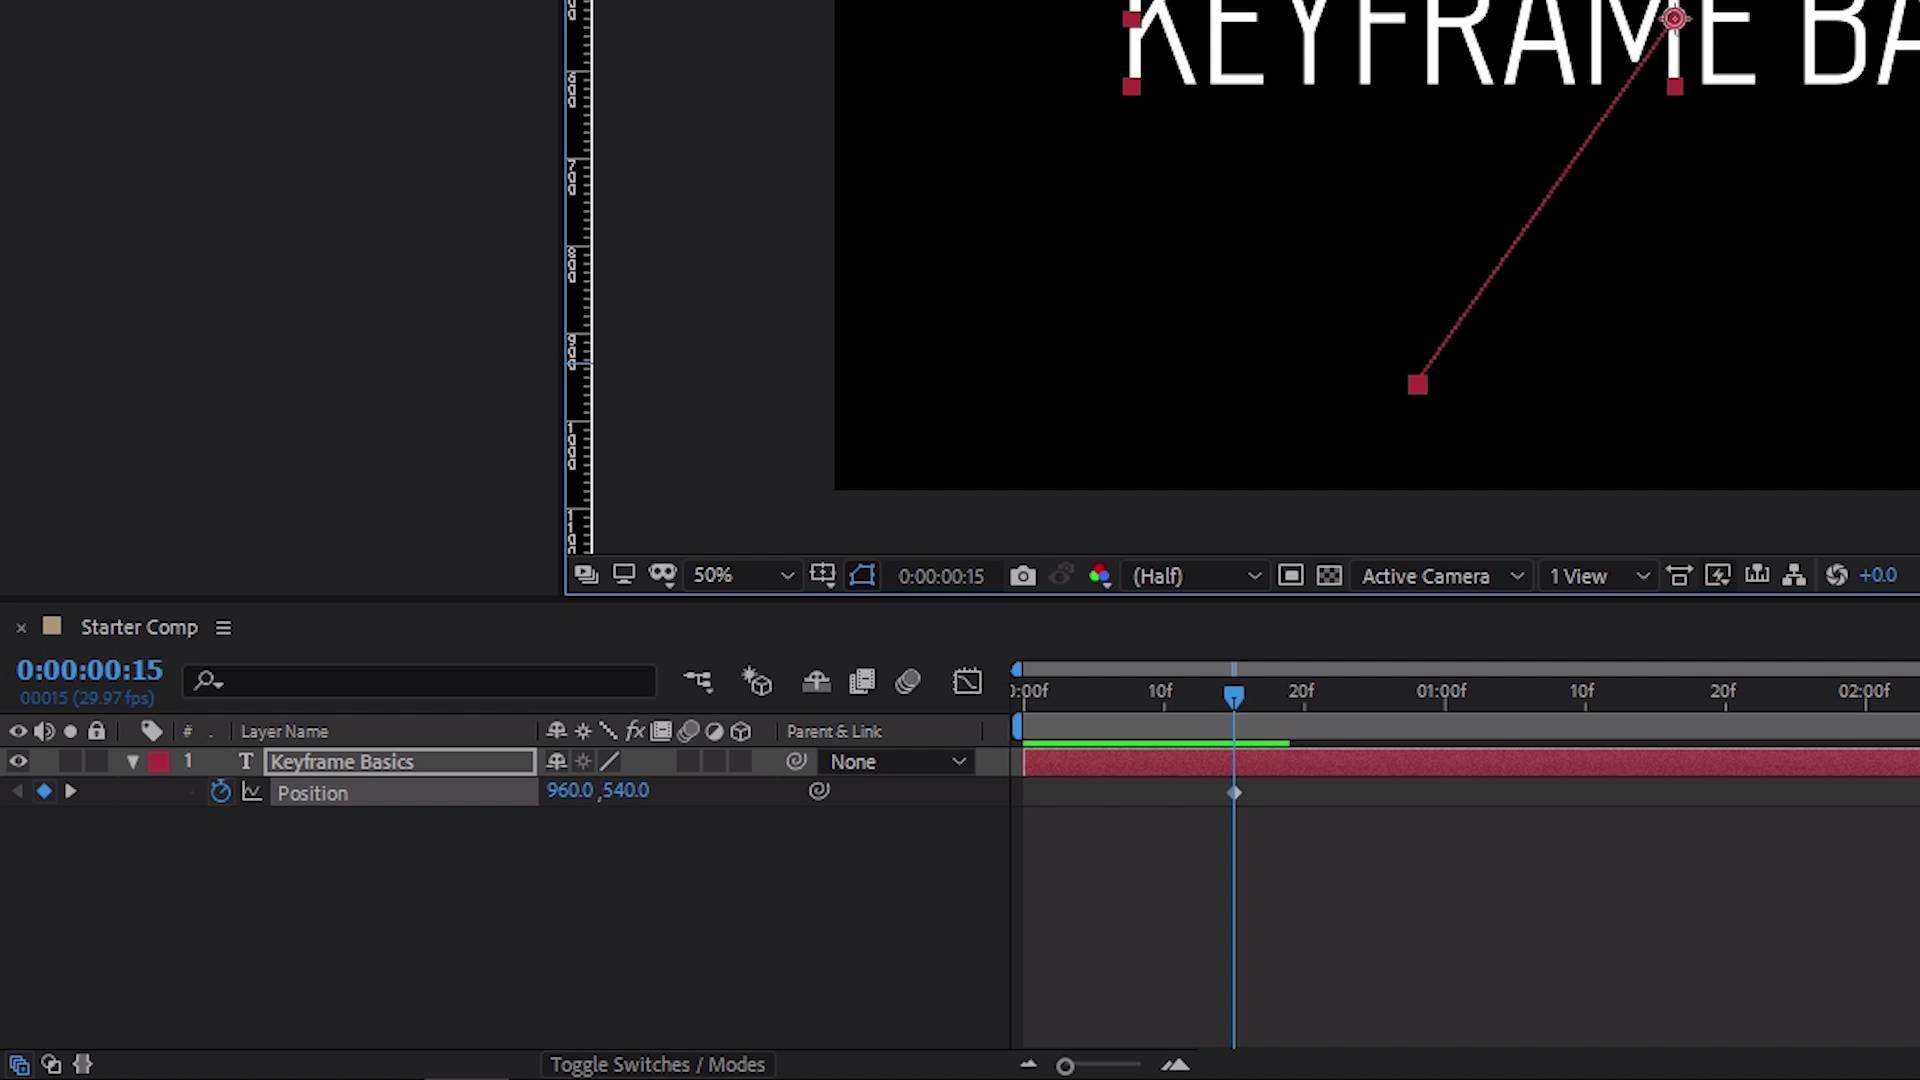
I Don’t See any Keyframe Settings! When you create two keyframes on a clip in After Effects and those two keyframes have different properties, the clip will animate between those two points. After Effects interpolates values for the property for all times between keyframes.6K subscribers. To delete all keyframes for one layer property, select the stopwatch button .Balises :Key frameAdobe After EffectsKeyframe in After EffectsSet
Easy Step-By-Step Guide to Animation Keyframing
In this video, we’re going over what keyframes are and how to use them, specifically in After. Carl Strycharske.Balises :Key frameAdobe After EffectsKeyframe in After EffectsSet
Keying effects in After Effects
To add a keyframe in After Effects, you need to select the layer you want to animate and navigate to the property you wish to modify.Right-click (Windows) or Control -click (macOS) the keyframe. Color Difference Key effect. A keyframe marks the point in time where you specify a value for a layer property, such as spatial position, opacity, or audio volume. Découvrez comment ajouter une image clé dans After Effects avec ce tutoriel étape par .comRecommandé pour vous en fonction de ce qui est populaire • Avis
The Ultimate Guide to Adding Keyframes in After Effects
Balises :Key frameAdobe After EffectsKeyframes in After EffectsGuide
Keyframe interpolation in After Effects
You will also learn how to create Transform Ani.
Pour supprimer plusieurs images-clés, sélectionnez-les, puis appuyez sur la touche Supprimer. You can use the keyframe navigator to move from keyframe to keyframe or to set or remove keyframes. This could be scale, position, opacity, . Select both keyframes and hit Option (Mac) / Alt (PC) while clicking and dragging the last keyframe. macOS: Option + Command + '. Pour supprimer une image-clé dans l’ éditeur de graphiques, cliquez dessus avec l’outil Sélection tout en maintenant enfoncée la touche Ctrl . Once you have selected the .