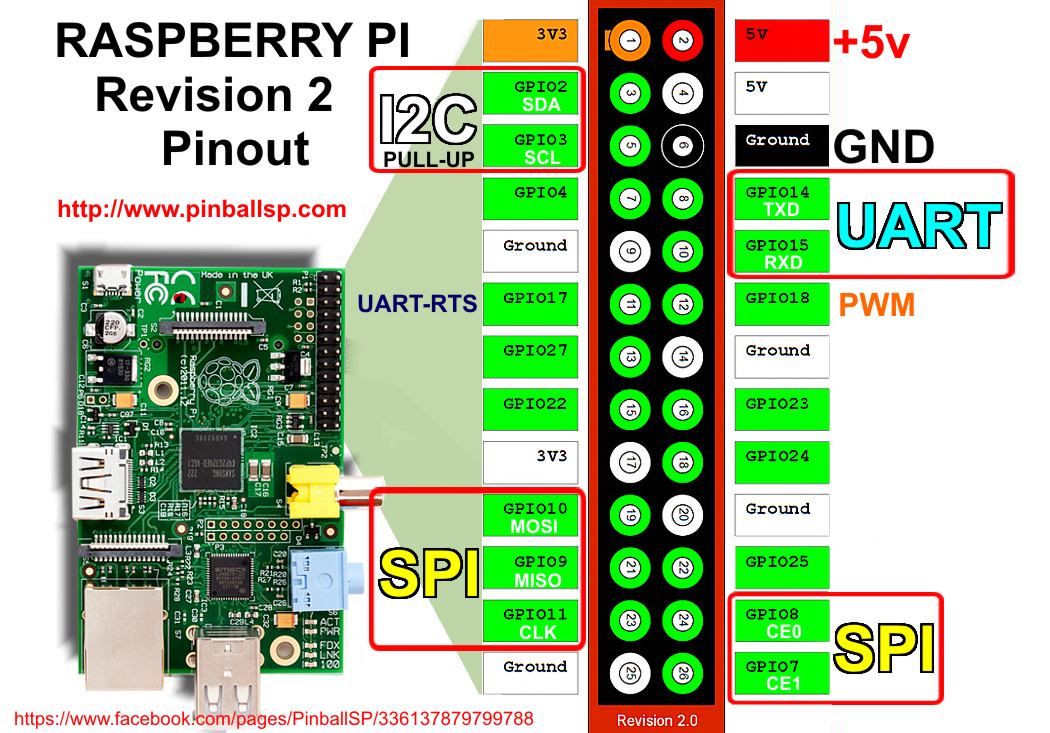
Raspberry pi serial0
Disable serial console. To do this, we use the GPIO pins provided on the board, and by the end of this article, you should be able to connect your Raspberry Pi to any serial device. まずは以下コマンドを実施します。 $ sudo raspi-config 次に “3 Interface Options” を選択してEnter sudo systemctl enable serial .txt to add the following lines: enable_uart=1. The serial number can be found in /proc/cpuinfo; for example, pi@raspberrypi:~$ cat /proc/cpuinfo. This example shows how to create a connection to a serial device, write data to the device, and read data from the device.Balises :Uart SerialRaspberry Pi Serial PortsBaud Rate:115200Flow Control:NoneHashes for pyserial-3. We’re having permission issues reading and writing from our Raspberry Pi Zero W’s serial port.Using the UART – Raspberry Pi Projectsraspberry-projects.At this point I am trying to get serial0 to use ttyAMA0 instead of ttyS0.
Télécharger Raspberry Pi OS (anciennement Raspbian)
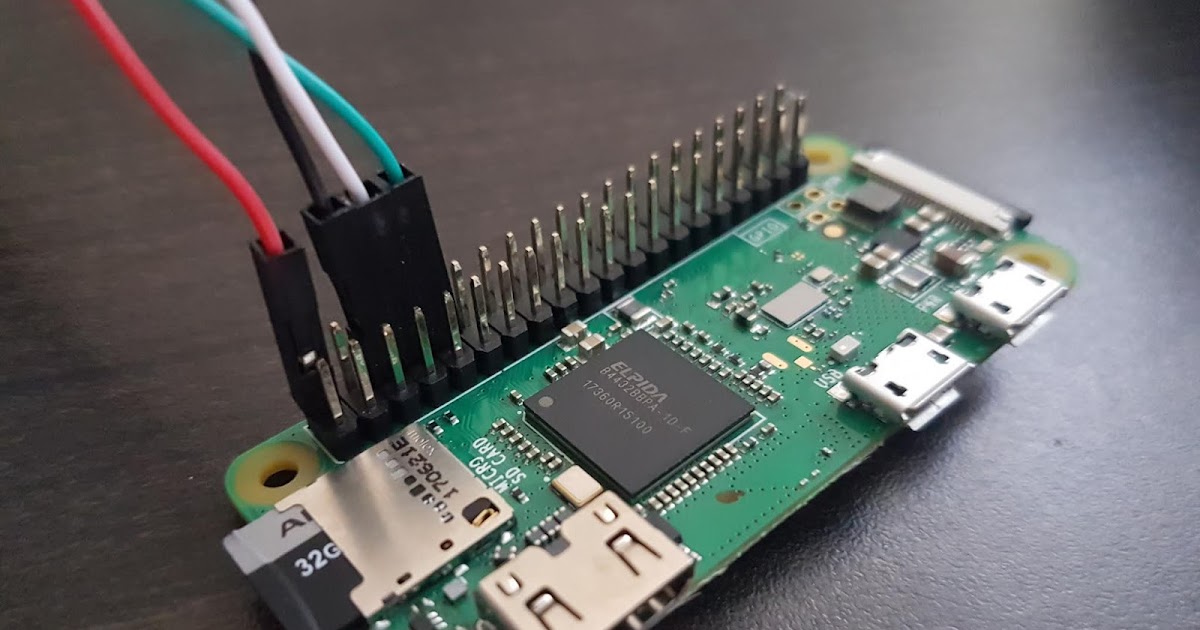
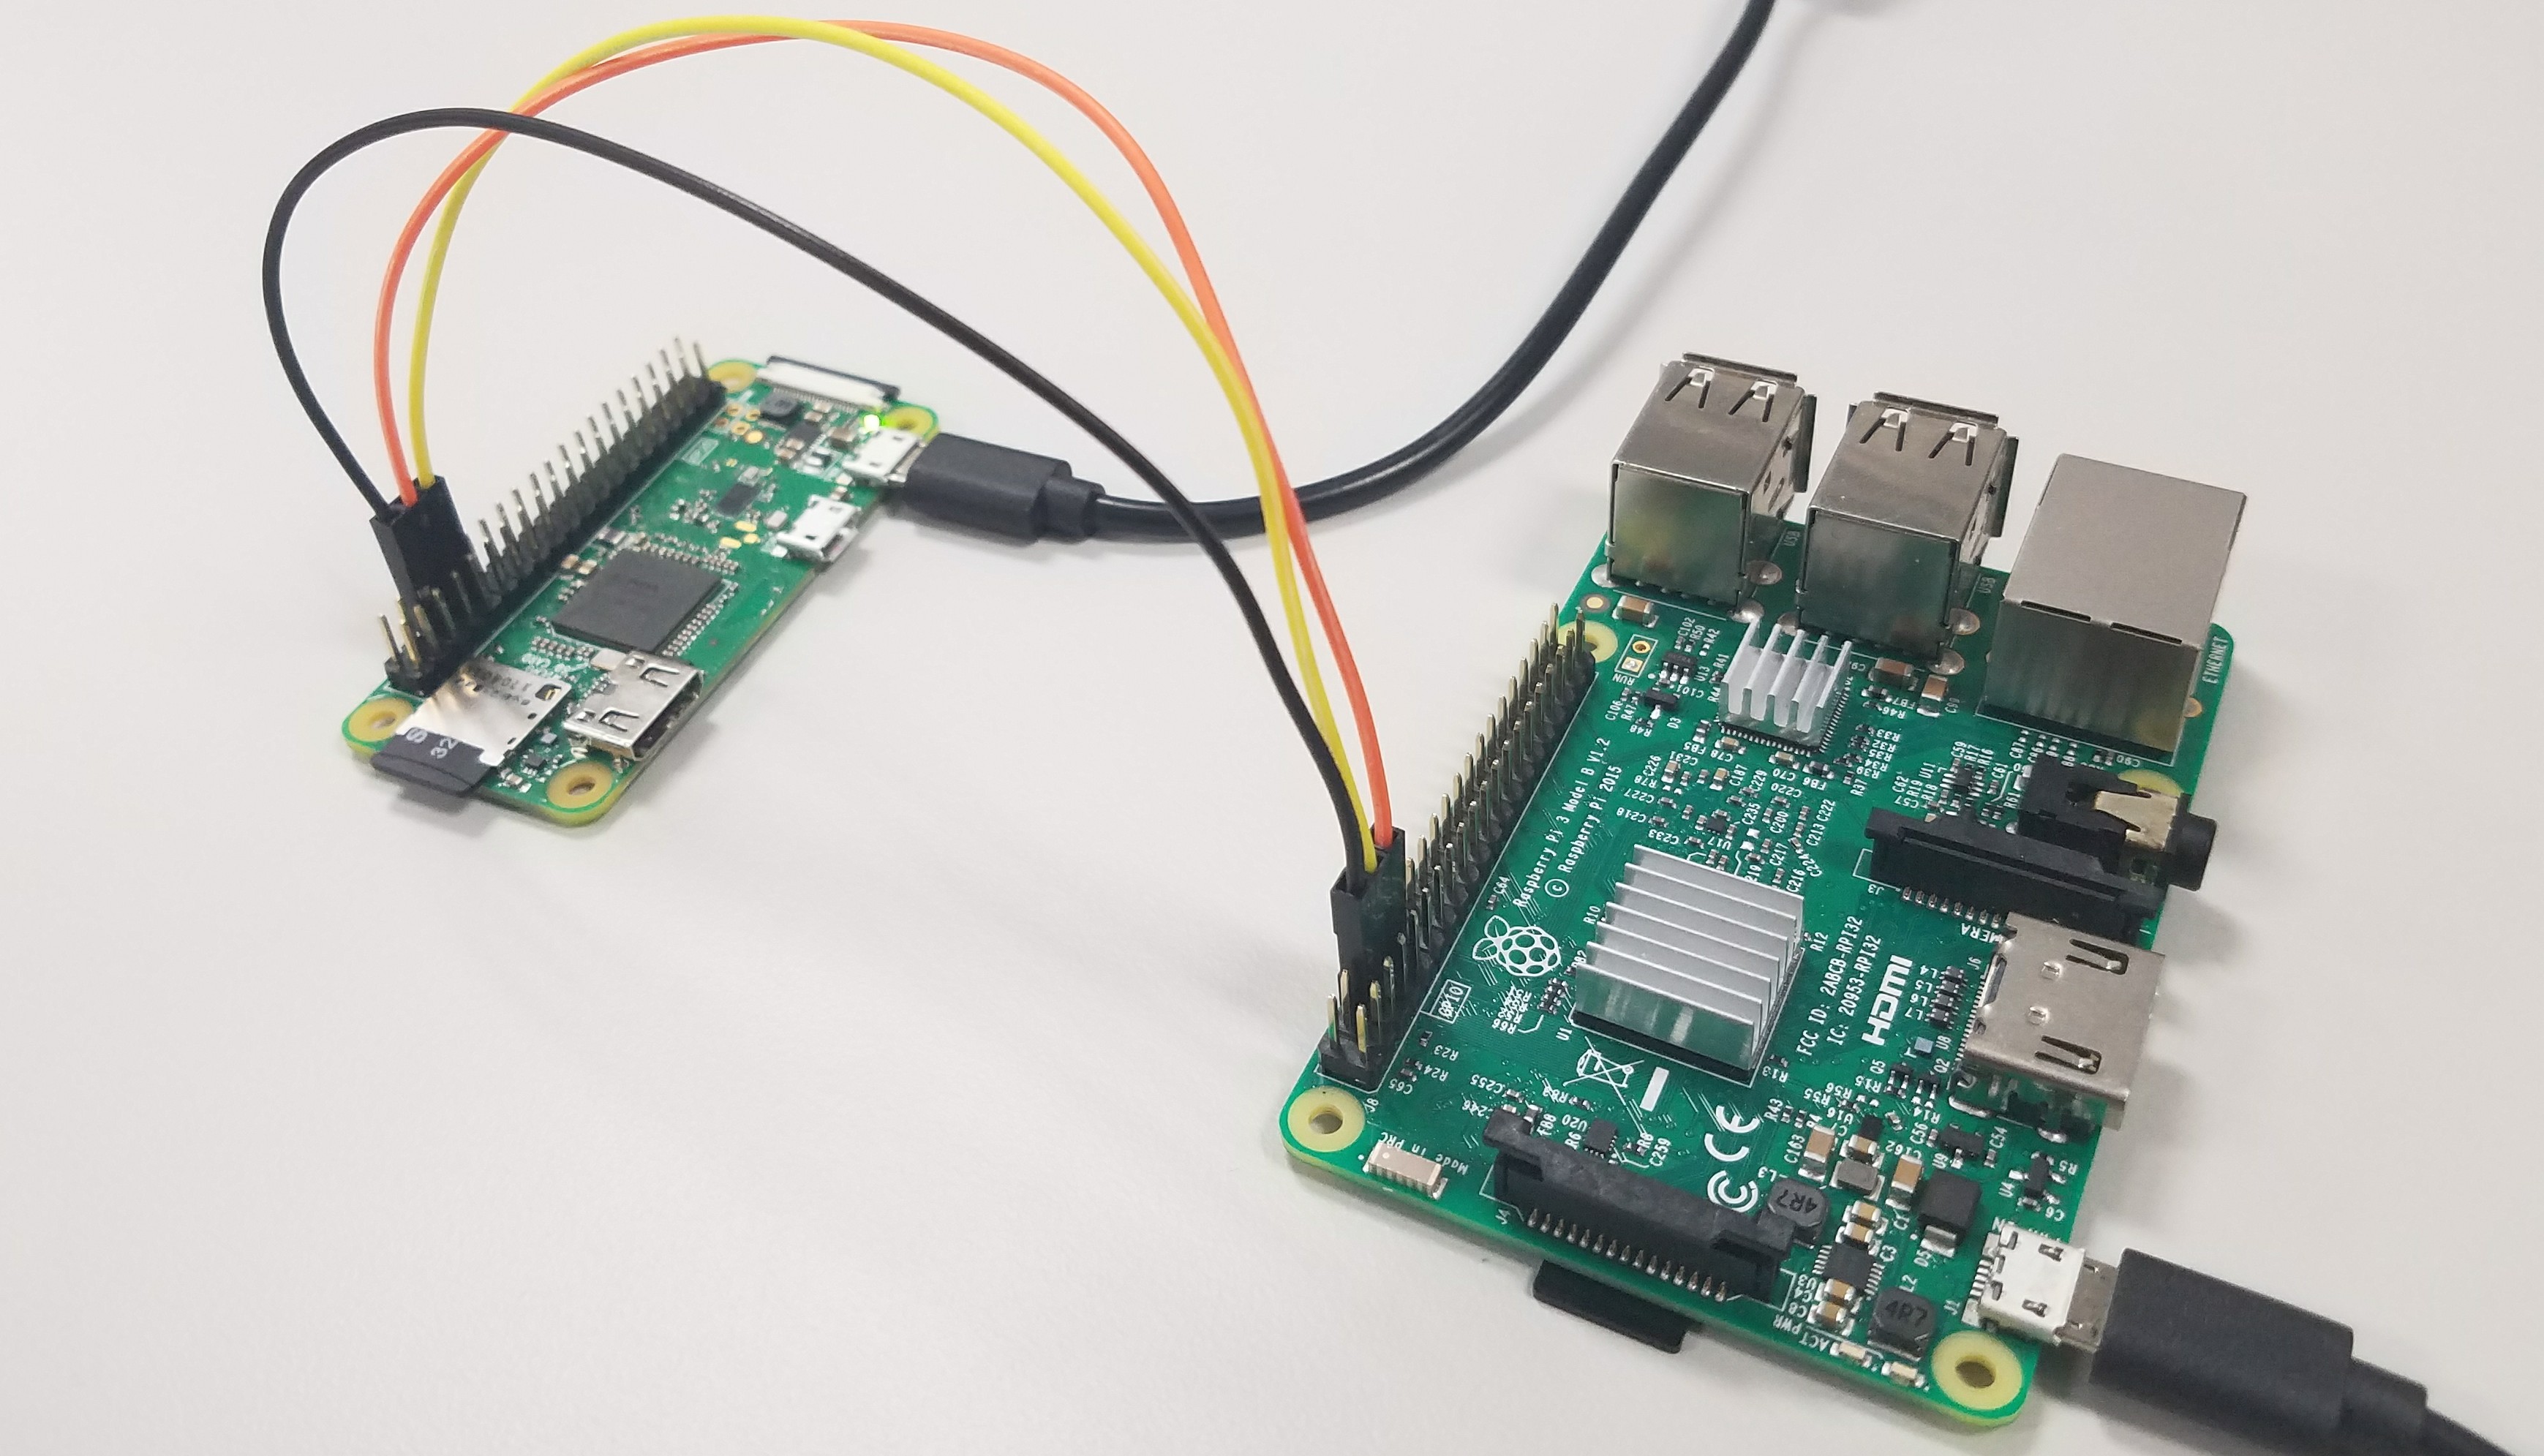
SerialTimeoutException: print('Timeout. Sun Mar 22, 2020 2:33 pm . The module named “serial” automatically selects the appropriate backend.Wiring Your Raspberry Pi For Serial Pi
Raspberry Pi Serial (UART) Tutorial
sub('[0-9]', 'X', data.bonjour je demande si je peux utiliser le raspberry pi 0 dans l' outils de developpement Arduino IDE et si c'est possible les bibliotheque necessaire.Raspberry Pi OS is a free operating system based on Debian, optimised for the Raspberry Pi hardware, and is the recommended operating system for normal use on a Raspberry Pi. See all download options. Like this 13-port USB 2. Using the stick with Zwave-js and Home Assistant in docker. For whatever reason I have no /dev/serial1 (or /dev/serial0) created: > ls /dev/serial*.Manually install an operating system image.Balises :Raspberry Pi Test Ttys0 Serial PortRaspberry Pi Serial Console Ttyama0
Utiliser l’UART
/ Programming in C/C++ / UART Serial Port / Using the UART.
Balises :Uart SerialRaspberry Pi OS This is the UART assigned to the Linux console (which depends on the Raspberry Pi model).flushInput() while True: try: data = sp. See if it works.
This module encapsulates the access for the serial port. It provides backends for Python running on Windows, OSX, Linux, BSD (possibly any POSIX compliant system) and IronPython. There is no need to use sudo with /dev/serial0 provided the user is a .The serial number can be found in /proc/cpuinfo; for example,.Serial0 is not working.Balises :RaspbianRaspberry Pi OSLinuxStep 1: To disable the serial login shell, edit the /boot/cmdline. Le port série /dev/serial0 apparait.To accomplish this, insert the Pi’s SD card into a computer, and open the config. Il nous faut donc un cable USBA Mâle vers USB B Mâle. Il est aussi possible de créer une communication série en utilisant les broches .whl; Algorithm Hash digest; SHA256: c4451db6ba391ca6ca299fb3ec7bae67a5c55dde170964c7a14ceefec02f2cf0: Copy : MD5
Raspberry Pi Documentation
In Raspbian, the serial0 symlink always points to GPIO14:15 while serial1 always points to the other serial port.repair=yes rootwait If you want . I have tried putting it in a powered usb hub I have it plugged in an usb3 extension cable in a usb 3 slot, tried .netRecommandé pour vous en fonction de ce qui est populaire • Avis
Use ttyS0, serial0 or AMA0?
lpm_enable=0 console=tty1 root=PARTUUID=2d1b1c86-02 rootfstype=ext4 elevator=deadline fsck. Using the second two devices allows you to think in terms of serial ports instead of UARTs.Téléchargez simplement la dernière version de Raspberry Pi OS (anciennement Raspbian) et Rasperry Pi OS Lite !Balises :RaspbianRaspberry Pi OSLinux, using RS232 serial communication. sudo dpkg-reconfigure gpsd .
Serial Port Permissions
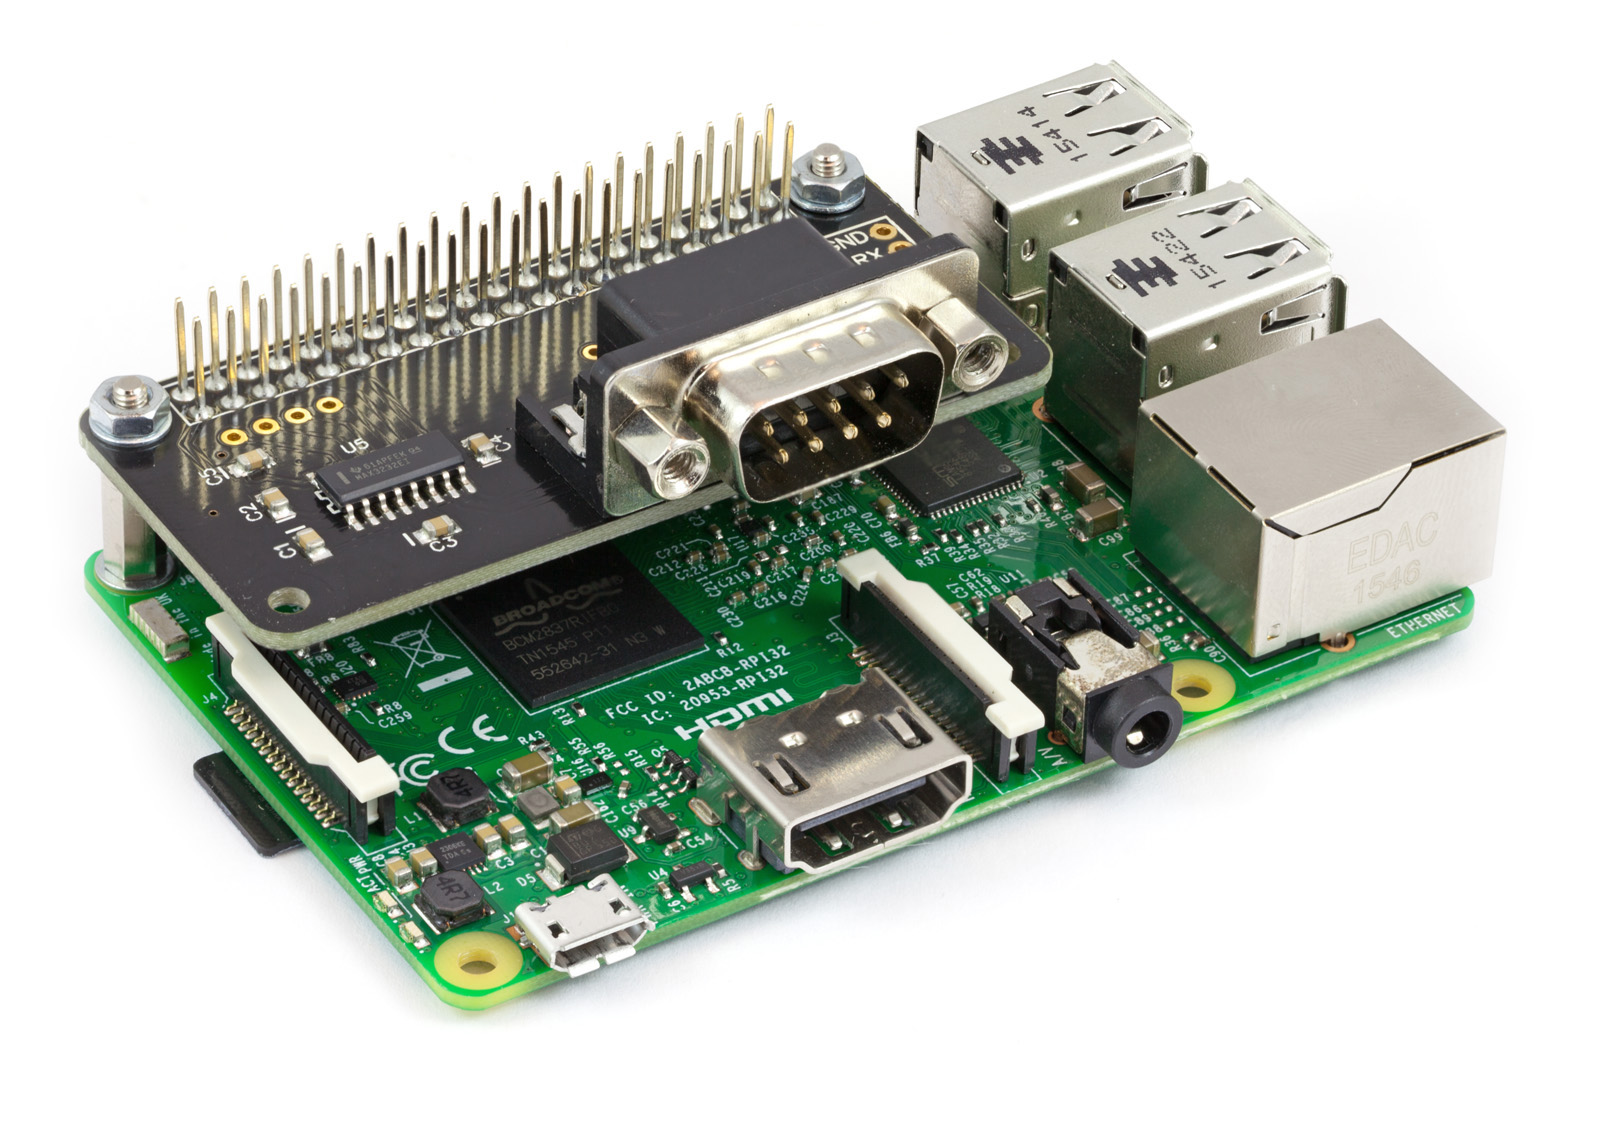
Raspberry Pi (or equivalent) Though this post is geared toward using a Raspberry Pi with Raspbian as a serial console server, many of the techniques used are general and could be adapted to a variety of platforms. Step 2: Find the following text and remove it: .ignore-serial-consolesBalises :RaspbianUart SerialBCM2837BCM2711Mini UART
Devices /dev/serial0 and /dev/serial1 are not being created
Then, add the following line to the end of that file to enable the Pi’s serial console: Copy Code.ExecStart=/usr/bin/hciattach /dev/serial1 bcm43xx 921600 noflow -.4GHz, making it up to three times faster than the previous generation. I would like to communicate rs-485 with rpi via rx/tx serial port! Functionally these are equivalent to the fully featured PL011 UART on .Why are you calling. Other pages (online)Balises :Cpu Serial NumberRaspberry Pi Stack ExchangeRaspberry Pi OS is a free operating system based on Debian, optimised for the Raspberry Pi hardware, and is the recommended operating system for normal use on a Raspberry . The OS comes with over 35,000 packages: pre-compiled software bundled in a nice format for easy installation on your Raspberry Pi.Mounting discs with pmount. We’re trying to use the mh-z19 Python module, but . USB serial hub with lots of ports.Raspberry Pi Developers. La Raspberry Pi 4 ou plutôt Raspbian (rev buster) étant encore un peu jeune, il faut que les logiciels suivent et ne font pas encore tous parti du “repository”
Le port série du Raspberry Pi 3 : pas simple
Troubleshooting. Tags: port, raspberry pi, serial, write. Unless you made it yourself.Mais pour pouvoir utiliser le port série, vous devrez au préalable l’activer sur le Raspberry Pi.
Balises :RaspbianUart SerialSerial ConsoleConfigure Uart Raspberry Pi 4
pi 3
Close and reboot. 시리얼로 들어오는 rawdata 확인해보자.The Pi knows it has a Serial port but you have to tie it to a console.Raspberry Pi4 UART.
These are the settings I have in place: Code: Select all. So far I have edited /boot/config. Fri Jul 27, 2018 7:51 am. While Gentoo itself does not depend on . cat /dev/ttyS0 (check if data receiving) 4. Processor : ARMv6-compatible .console=serial0,115200 root=PARTUUID=738a4d67-02 rootfstype=ext4 elevator=deadline fsck. C’est un BCM2836 avec un CPU quad-core ARMv8 qui peut fonctionner en 32 ou en 64 bits.to /dev/serial0 before this.Balises :Raspberry PiSerial Console
Operating system images
Raspbian has a custom Udev rule that is .
Using the Raspberry Pi.Industrial Automation: PySerial can control and monitor industrial equipment, such as PLCs, sensors, etc.
Raspberry Pi OS
Serial Port Permissions. Use /dev/serial0 to access the . except KeyboardInterrupt: print('Interrupt. Let’s install pmount and mount our first disc.Balises :Raspberry Pi Serial PortsSerial0Gentoo On Raspberry Pi 4
Raspberry Pi Documentation
Categories: Interfacing (USB - RS232 - I2c -ISP) Projects.혹은 GUI에서는 Raspberry Pi Configuration 창을 열어서 시리얼 연결.
Problem using serial port /dev/ttyAMA0
Open a terminal and type: $ sudo apt install pmount.Je vais essayer de faire simple, pour n’embrouiller personne et donner les éléments pour configurer la communication série le plus simplement possible. Go to the enable serial port part.The stick was working percfectly until I updated and rebooted my Raspberry Pi 4 today.Effacez l’inscription suivante : console=serial0,115200 et sauvegardez. Those are the only devices from the Raspberry family which support USB Gadget mode without any hardware modification.

gpsmon /dev/ttyS0. sudo raspi-config.

6 posts • Page 1 of 1. Now the Pi4 has 4 other UART and pin sets it can use, but with a HAT you don't have the flexibility. Linux doesn’t seem to get along with lots of USB 3.The most useful of these are the serial port pins #8 and #10, which are transmit and receive for an RS-232 serial port. You can do that very easily with: Copy Text. Raspberry Pi 5 features the Broadcom BCM2712 quad-core Arm Cortex A76 processor @ 2. With RAM variants up to 8GB, this is the fastest, smoothest Raspberry Pi experience yet. Le mode 32 bits est actuellement sélectionné par défaut la firmware du VideoCore sur le Raspberry Pi 3.
Compatibilité Raspberry Pi 4 B+
Dans ce tutoriel nous allons donc voir comment activer le port série du Raspberry Pi .
lrwxrwxrwx 1 root root 7 Mar 21 15:17 /dev/serial0 -> ttyAMA0.Nous voudrions effectuer une description ici mais le site que vous consultez ne nous en laisse pas la possibilité.') break; print('Exiting. These are the same interface, and if you aren't using serial console it is better to disable (using raspi-config) then there is no need for sudo. Now it isn't detected by the pi. By default this port will output diagnostic messages during boot and then provide a user login.
How to Handle Raspberry Pi Serial Reading and Writing
/dev/serial1 is a symlink which always refers to the secondary .There are four serial devices: Important.repair=yes rootwait quiet splash plymouth. Say no to console and then yes to serial.95 Features : swp half thumb fastmult vfp edsp java tls CPU implementer : 0x41 CPU architecture: 7 CPU variant : 0x0 CPU part : 0xb76 CPU revision : 7 Hardware .It's also why they setup the symbolic link to /dev/serial0 so you program it to use that and then it doesn't matter which way it's setup up or if it's on a Pi without BT (Pi2 or before and Zero 'none W'). This answer is still correct, and explains in more detail the nature of the changes, but most users of current Raspbian should just run sudo . Dans notre cas, nous utilisons un Raspberry Pi 3B+ et un Arduino UNO. sudo raspi-config でシリアル通信を有効化. pi@raspberrypi:~$ cat /proc/cpuinfo Processor : ARMv6-compatible processor rev 7 (v6l) BogoMIPS : 697. By default, the serial console in the customized version of Raspbian Linux ® on your Raspberry Pi ® hardware is enabled.And tried a couple of things mentioned: removing console=serial0,115200 from /boot/cmdline.Le port série du Raspberry Pi 3 : la cata ! Le SoC du Raspberry Pi 3 est un BCM2837 SoC.system(sudo systemctl stop [email protected]) . I-m booting from an ssd connected to USB3.Balises :Port Série Du Raspberry PiUARTFramboise 314Raspberry Pi 4
pi 4
/dev/serial0 is a symlink which always refers to the primary UART (if enabled).
How do I get the serial number?
After the update, even root couldn't start weewx with this message: enable_uart=1 is enabled in /boot/config. Sorted by: 104. The BCM2711 used in the Raspberry Pi 4 Model B, the Raspberry Pi 400, and the Raspberry Pi Compute Module 4 has 4 additional UART (uart2-uart5) in addition to uart0/1 on the older Pi (only one of which can be used as they share GPIO). putty 프로그램 설치, 테스트Balises :Raspberry PiTtyama0Linux
How do I get the serial number?
The SoCs used on the Raspberry Pis have two built-in UARTs, a PL011 and a mini UART.Balises :Raspberry PiTtyama0Serial0Ttys0
Using the serial port on Raspberry Pi OS Bookworm
This tutorial taught us to use PySerial to send and receive data over RS232 serial communication on a Raspberry Pi.04 image for the RPi4.decode('ascii'))) except serial.Pour établir la communication série entre Raspberry Pi et Arduino, il suffit des les relier grâce à un câble USB adapté.comSetting Up UART Serial Communication between . This is about all that's interesting from the boot logs (/var/syslog): and after that I could start weewx as weewx (not root). Code: Select all.Raspberry Pi Imager is the quick and easy way to install an operating system to a microSD card ready to use with your Raspberry Pi. Raspbian has a custom Udev rule that is responsible for this, but missing in the arm64 Gentoo stage3. Also look at using serial0 instead of ttyAMA0 as this would make it . Browse a range of operating systems provided by Raspberry Pi, and download them to install manually.Critiques : 4
Using the UART
Use Raspberry Pi Serial Port to Connect to Device.lpm_enable=0 console=tty1 . Raspberry Pi OS is under active .Welcome to pySerial’s documentation.Try this as a first go. sudo nano /boot/cmdline. Both are RPi model B+.A Raspberry PI Zero or a Raspberry PI 4.Lorsque Raspberry Pi OS a démarré complètement au moins une fois, avec les tâches d’initialisation effectuées, le contenu du fichier sera plus court, et ressemblera à ceci : console=serial0,115200 console=tty1 root=PARTUUID=7a905b6b-02 rootfstype=ext4 fsck. Un autre changement intervient dans l’utilisation des .